Self Portrait Photography for Bloggers: My Secrets for Taking Your Own Blog Pictures
HOW TO TAKE PHOTOS OF YOURSELF FOR YOUR BLOG OR INSTAGRAM
**This post contains affiliate links. Meaning, when you click on a product link, I can make a small amount of money, either in the form of the click itself, or in commission if you purchase anything from the site.
So you want to start a blog, or maybe you already have one, BUT, you want to post allllll your cute outfits, makeup or hair looks and have no idea how to get the necessary pictures? I mean, you could hire a photographer, but that can get REALLY expensive. Or, you could have friends/family shoot for you, BUT you’ll have to rely on their schedule so that isn’t always practical.
The solution? You could,like me, learn how to take good pictures of yourself. Yep, I shoot all of my photos myself! Crazy right? I get asked all the time who my photographer is, or how much I pay for my photographer and I take those questions as huge compliments since that “photographer,” is actually me:)
When I first started blogging years and years ago on a different space, photography for blogging wasn’t really a thing. I would ramble on about favorite pieces or products, provide links and use pictures from those websites, but there wasn’t that aspect of actual stylized photography or taking outfit pics or anything like that. So when the blogging world started changing, I knew I had to too and that meant creative, lifestyle photography.
The problem? I wasn’t a photographer. I didn’t have money to hire a photographer. And I was single…so, no boyfriend or husband to help me get the perfect shot. That meant one thing…If I was going to blog, I needed to learn how to photograph my outfits by myself. And never one to back down from a challenge, I did a TON of research. But there was one thing that was nearly impossible to figure out: how to take pictures of myself. Like good pictures, not selfies. Enter this blog post. Even if you have someone to help you, you still might from time to time find it way more convenient to take the shot/shots on your own, and hopefully I can help you get the perfect pic!
What Camera Equipment Should You Use For Blog Photography
Guys there are SO many options out there, so below, I’m telling you what I use. That said, make sure you do your own research because you might find something that fits your needs better.
So first thing's first...you've got to get yourself a decent tripod. You can find a variety of these online and in most stores but this Sunpak 620-080 Tripod is the one I use, from Best Buy. I like it for a variety of reasons - mostly because it can vary in height from 24" to 61". The pivoting head allows me to shoot both horizontally or vertically at nearly any angle. This particular brand and model is really great quality as well - lightweight but sturdy.
Camera wise, I shoot with the Canon Eos Rebel SL1, BUT, I'm linking to this, Canon Eos Rebel SL3 the updated model. Most standard packages come with a traditional lens, an 18-55mm option. That said, if you want the blurred background effect that give all of your photos that professional touch, you'll need a standard 50mm lens. I use the 50mm for all of my outfit shots and actually, for almost all of my shoots in general. I will sometimes use the 18-55mm for detailed product shots.
How to take your own blog photos
So that’s what I use, but how exactly do I take them? That’s where this really gets fun:) Like I said, I always use my 50mm lens because I really want the blurred background with me/the outfit the focus. However, a 50mm lens does not let you zoom. Meaning, you will need to change the distance of the camera and tripod to your subject (i.e., you), to get photos that are closer up or more detailed, or further away to include more of the background.
The most difficult part of taking my pictures, especially when I was first learning, was finding the focus. This literally took me years to figure out guys. I would take what I thought were great photos, because nice and compact in the viewfinder, they did look pretty good. BUT, when I downloaded them they were not in focus at all. So frustrating! I was “moving” my little focal point to where I was going to be standing, so why wasn’t it focused where I was standing??? Ahhhh!
To fix it, I had to stop thinking about me as the “focal point,” and instead starting thinking about the location I was standing in as a focal space. If I move the focus on the viewfinder to a certain point, it’s really focusing on a space a specific distance from the camera. And when something is standing in that space, a specific distance from the camera, it will be in focus. Make sense?
Let’s say I’m standing in front of a brick wall and I “think” I’m going to be the focal point. I move the focus to around head or chest level. Set my timer and stand in front of my camera waiting for the timer to go off and photos to snap. Until I learned this little trick I’m about to share, only about 50% of the pictures I took would actually be in focus. Why? Because the camera was most of the time focused on the brick wall and even when I stood in front of the brick wall, I thought I would automatically become the focal point. Sometimes I would, many times I wouldn’t. That’s because the lens was focused on the wall space, not the space in front of the wall.
Enter your new best friend, manual focus. On my camera lenses it appears as MF right next to its friend AF (Auto Focus). And yes, the non-photographer side of me laughs a little when I actually say MF and AF, as in today’s world, we know those have totally different meanings.
Anyway, back to taking pictures of yourself for your blog and Instagram! When your camera is all set up on your tripod, you’ll want to make sure it’s set to AF (auto focus). Move the focus to the area you’ll be standing in. You may want to use a rock, leaf, bag, crack in the ground or pavement, etc, as the “location” of the focus. No, it does not matter that you’re focusing on something on the ground. Remember, the camera will shoot the space, so if you’re standing in the location the focus is set, you’re still in the space.
Once you have the location decided for your focus, you’ll need to “set it.” This just means you’re going to set it to that specific location/space, so it can’t jump around to anything else. To do that, you’ll switch from AF to MF (manual focus). Boom! You’re ready. Simply set your timer and position yourself in that space.
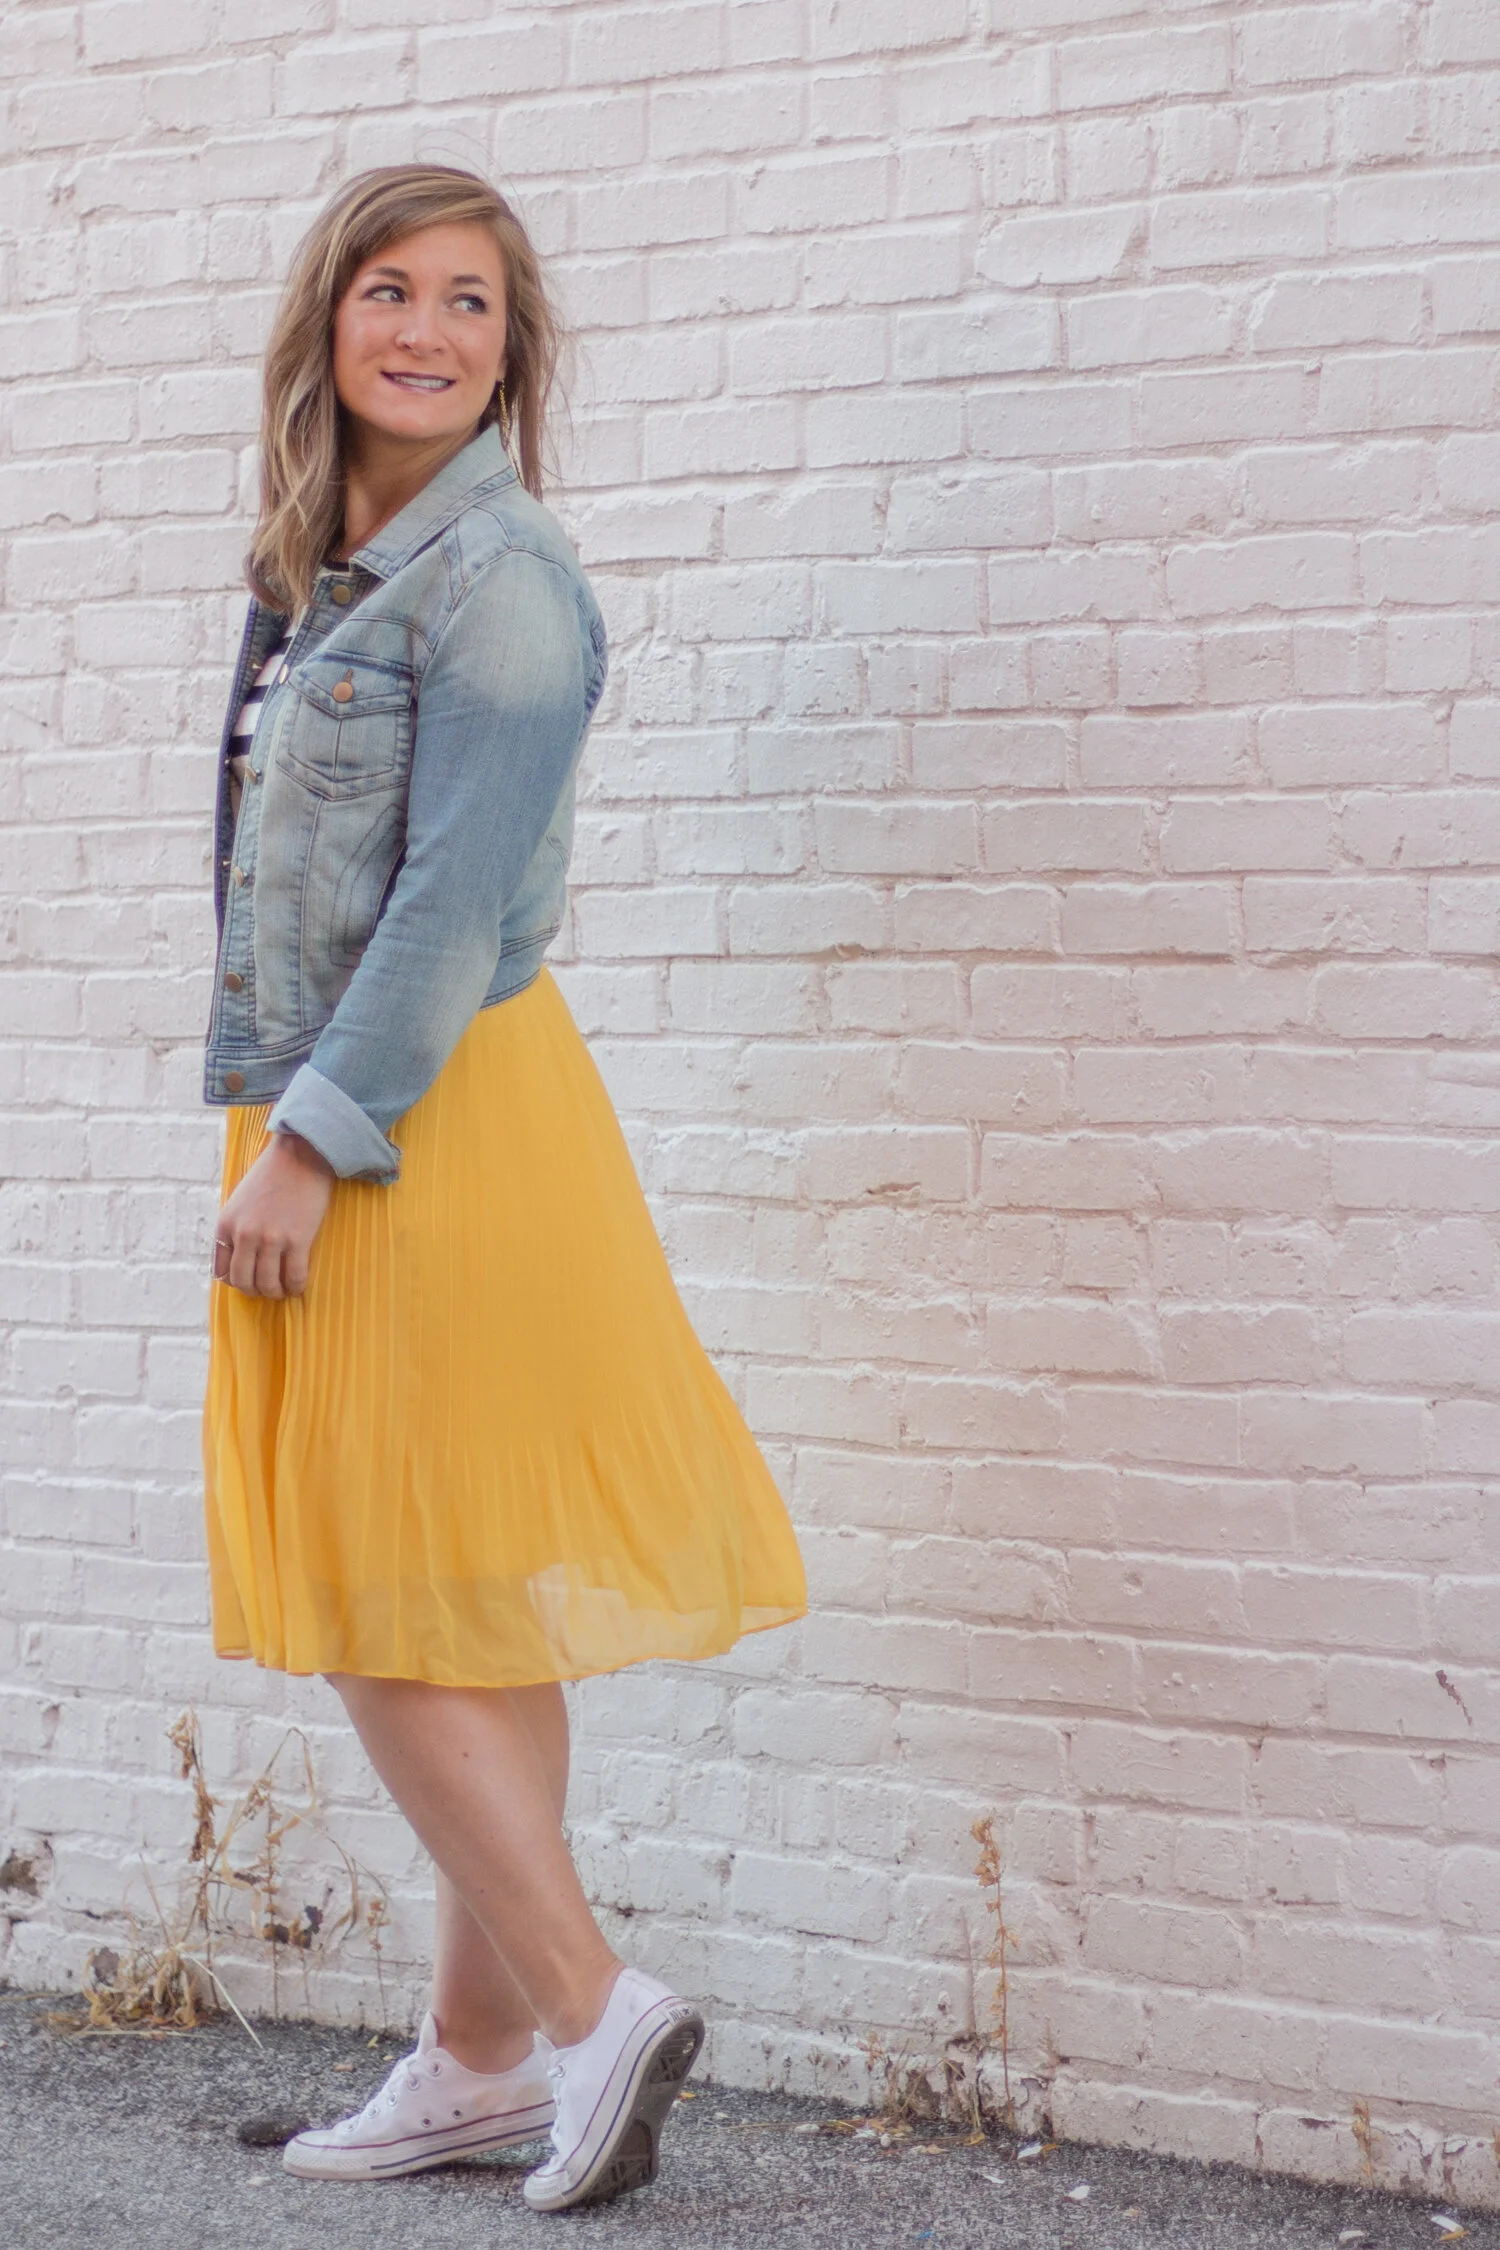
To get more of a closeup, such as the photo below, I tilt my camera down toward the ground, set the focus to a specific space, tilt the camera back up, and stand in that space.
Another trick I sometimes use can be just a little more difficult but works in the same way. There may be times…maybe you’re leaning up against a wall for example, that you can focus on the wall, which will not be the exact space that your body will be. Your body will be about a step in front of the wall. Set the focus to the wall and then move your camera/tripod a step backwards.
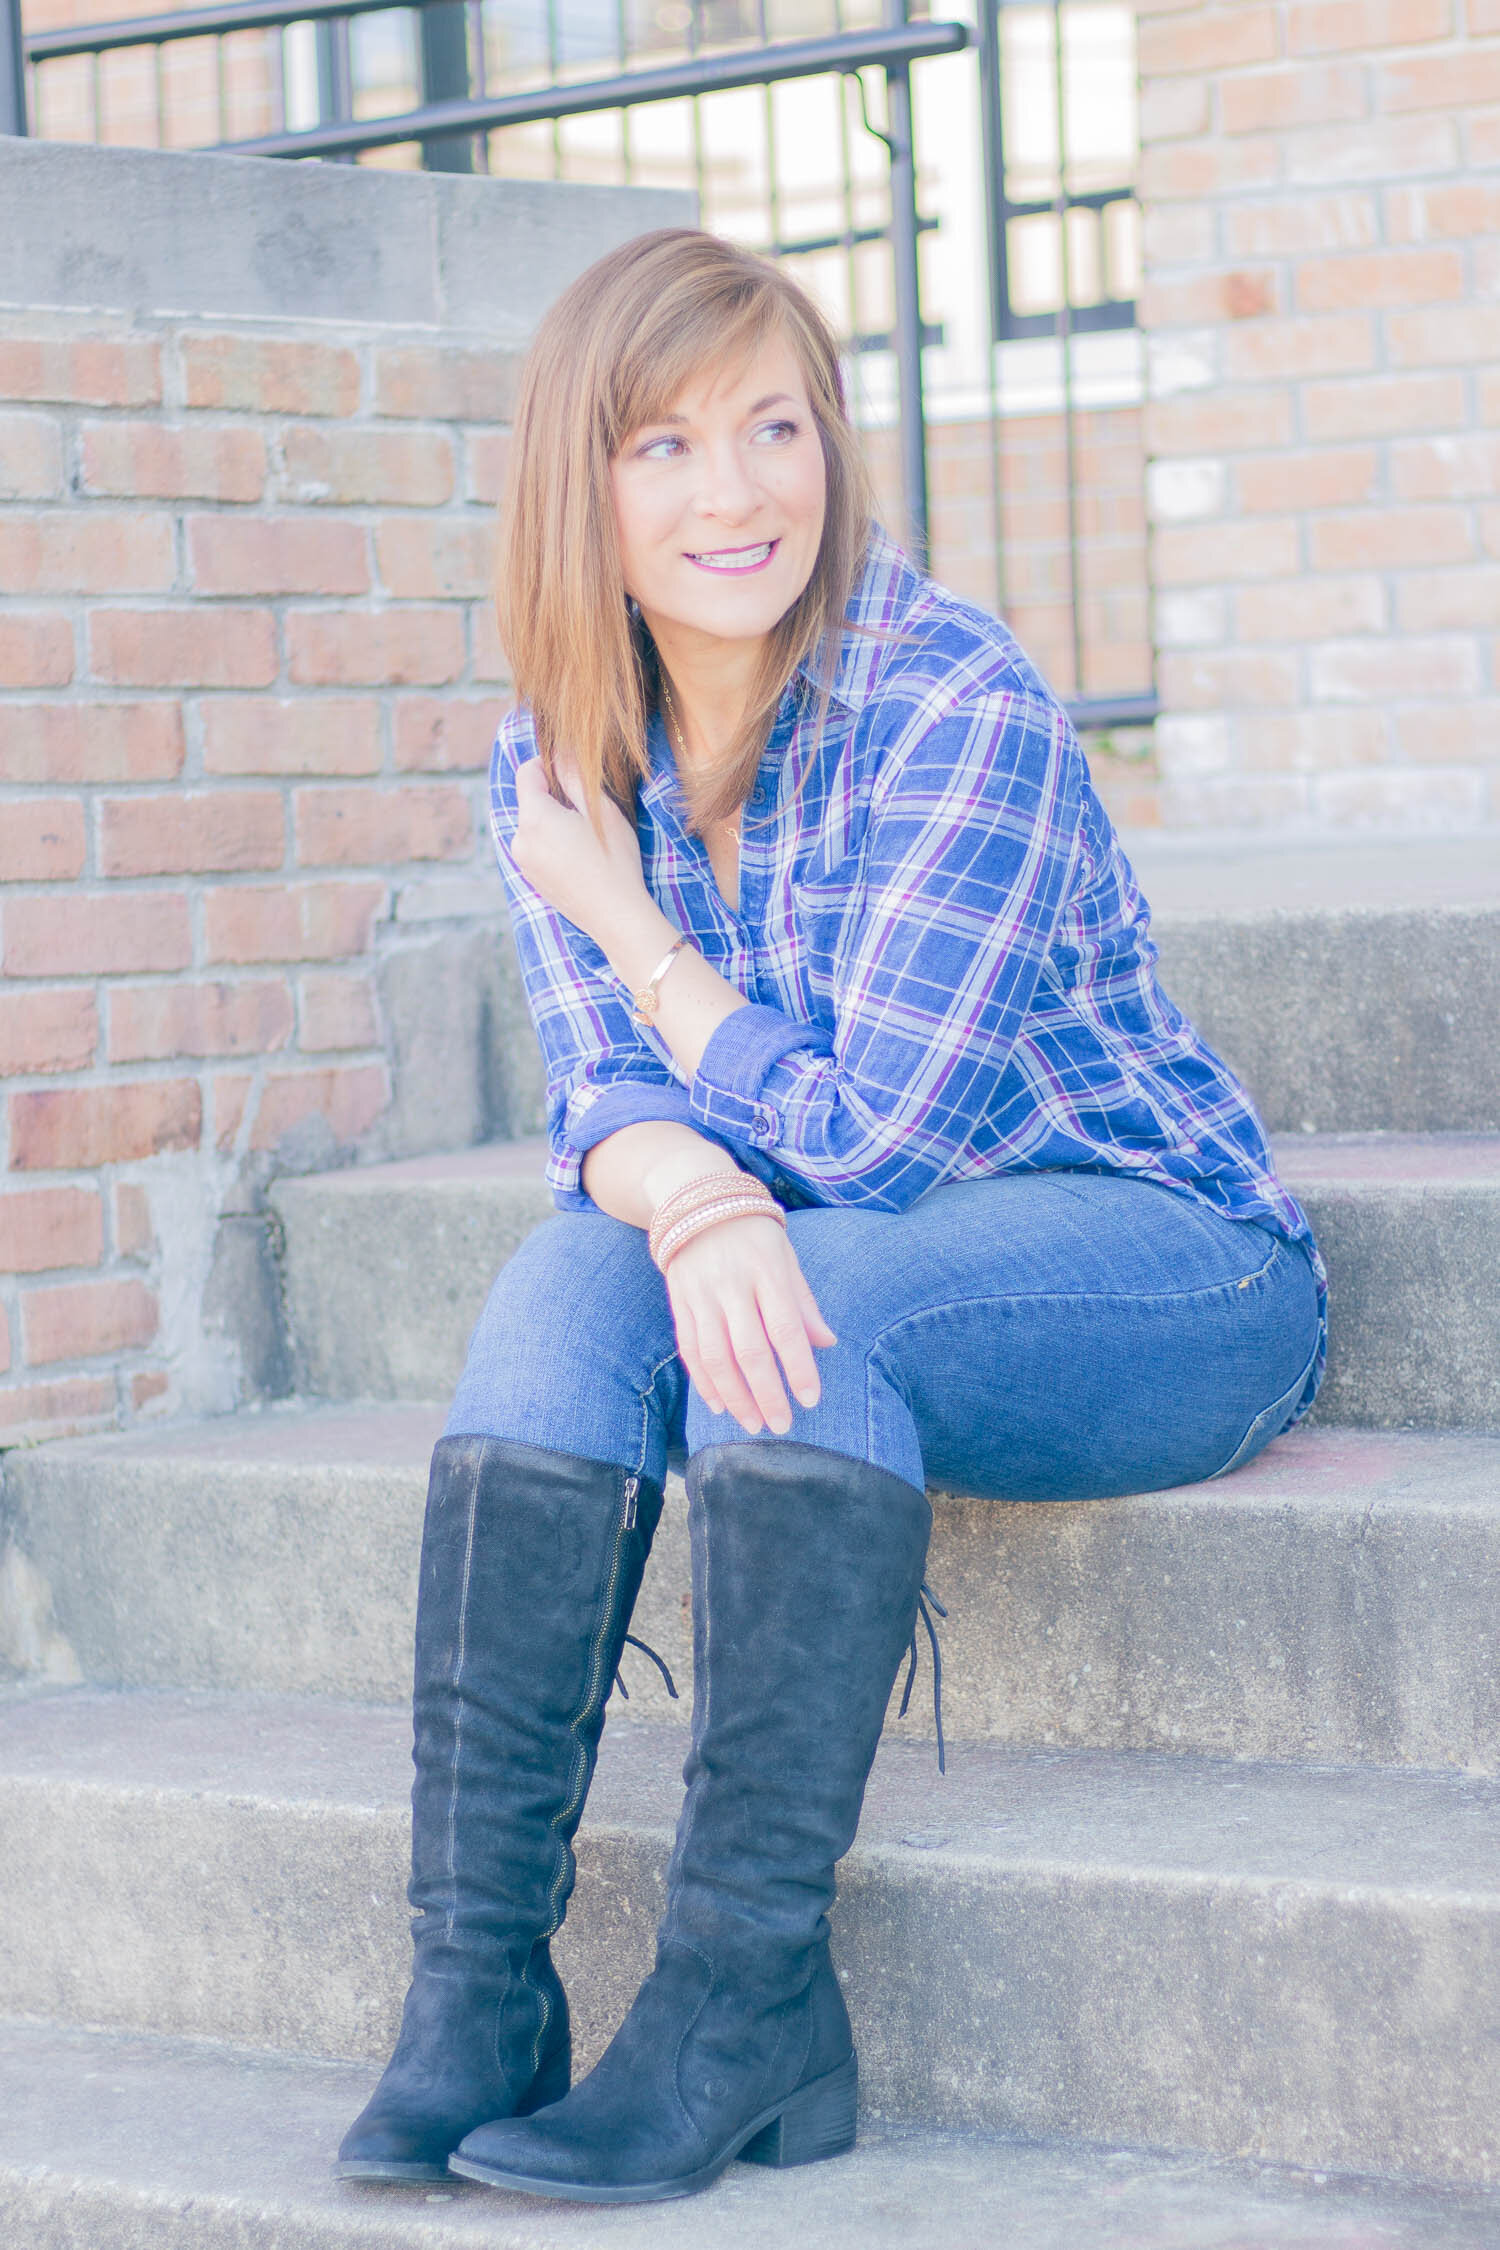
Please note, you don’t have to always focus on a space on the ground. Maybe you’ll be sitting on a bench, or step, like I am below. I would then set the focus to where I’m sitting, versus the ground.
I hope these self photography tips help - it was such a frustrating experience trying to learn how exactly to take my own photos, knowing that was the most practical option for me.
If something doesn’t make sense or more info is needed, please ask via the comment section below!
